Today we will tell you how to make your own build in Dota 2. This is one of the main questions that Dota players start to worry about after initially learning the game and getting some idea of its gameplay. It is quite understandable that you, like any other gamer, want to win and intend to find such «chips» that you can convert into success on the gaming battlefield. And information on how to make your own build in Dota 2 is a fundamental step towards winning.
So, first we need to answer the question «Why». That's the key question. Why would you create a specific set of in-game items for a character? For example, most players do it for the following reasons:
Finding the most optimal combination of in-game items to maximize the abilities of a particular character.
Simplifying the routine processes of the game, because having a build helps you not to think about which of the items you need to buy right now.
Demonstrating talents in front of the Dota community.
Entertainment and fun.
Algorithm of Actions (Part 1)
Everything from start to finish is done through Steam. No third-party resources or «left» links, because at best you will just waste your time there, creating a build on outdated Dota 2 patches, and in the worst case – pick up a virus. After all, you're thinking about the possibility of making your own build in Dota 2 to save precious seconds during gameplay and not think about purchasing items. Therefore, we think you will agree that you need to create your own sets of in-game items quickly, without problems and with the guarantee that they will work during the match.
This feature is available to any player and for any hero without restrictions.
After logging into Steam, open your Dota 2 game collection.
Once downloaded, look for a section at the top of the screen called «Heroes». That's where you go. Now you need to find «», which is also at the top.
Then you will see some buttons at the bottom. Select «Create» and click on this button. About a third of the way through, you will be presented with a full list of game characters. Choose one — the one for whom we will compile the build.
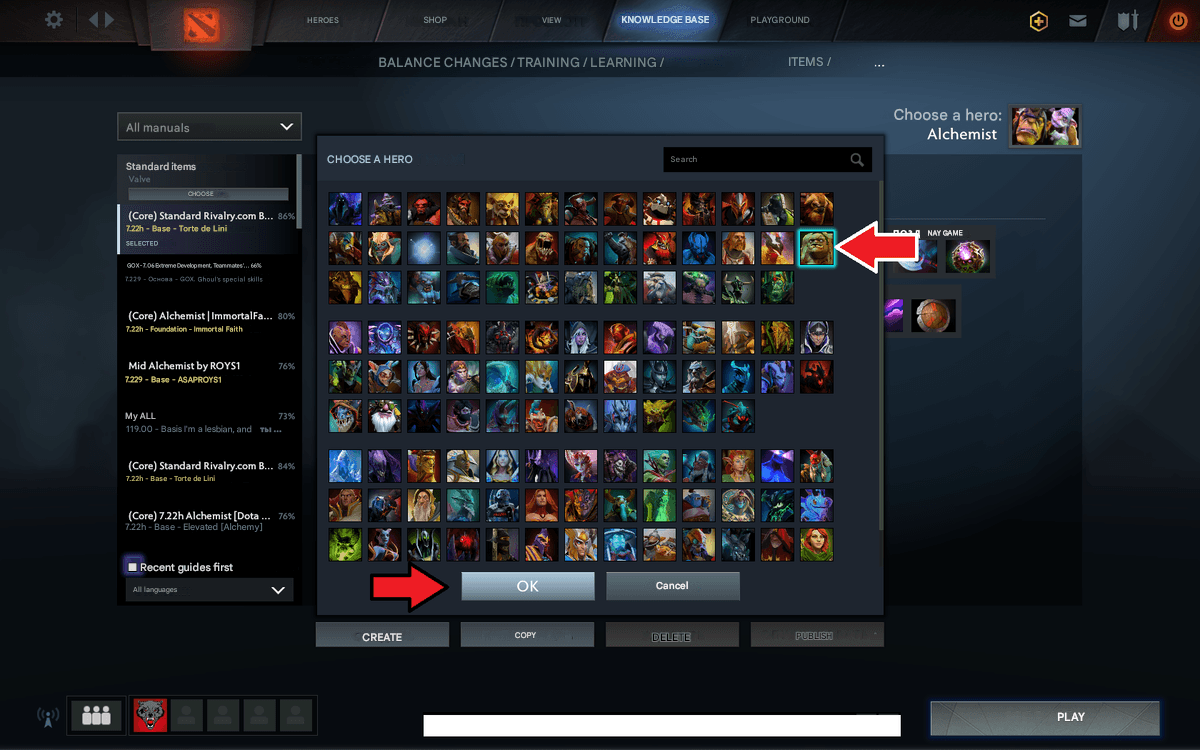
Algorithm of Actions (Part 2)
Click on the selected hero. Your choice will be shown in the upper left corner of the screen, where the icon and the name of the character will appear.
Let's move on to the most interesting part of making your own build in Dota 2. Follow the steps below:
To make it easier to navigate through the various guides, select the character role you are building for. For example, it can be offlane, roamer, or support roles.
In the «Guide Name» column, be sure to write the name of the collection, otherwise you may get confused in the list of guides and will not be able to find it later.
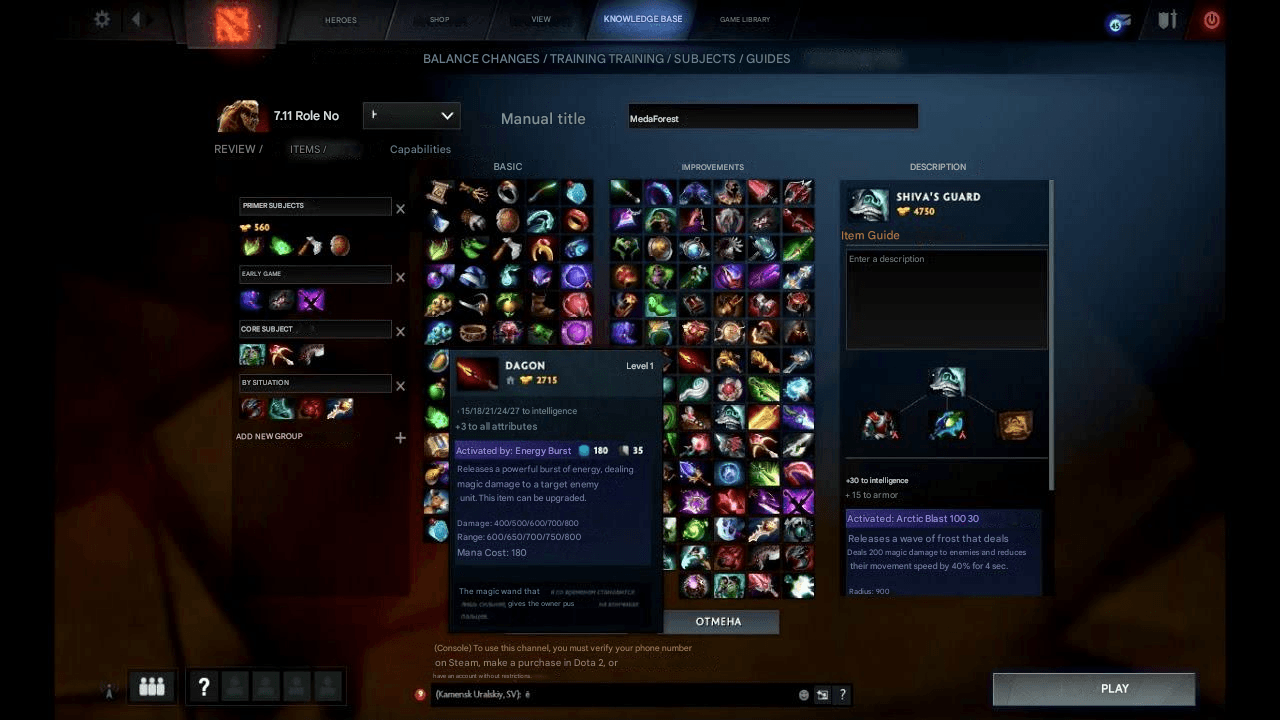
Under the hero's name, subgroups are displayed, into which you can drag and drop the required items. Subgroups can be renamed, but usually, their names correspond to the stages of a Dota 2 match.
Hold down the left mouse button, pick up the desired item in the store, and move it to the subgroup you are interested in. Form collections of items for each stage of the game by repeating this simple action. Now you know that making your own build in Dota 2 is almost completely realistic.
Algorithm of Actions (Part 3)
The actions described earlier were performed in the «Items» tab, opened by default after selecting a hero. But it's not the only one there. In the «Initial Items» section (this includes items acquired during the initial purchase), the build is formed in the same way as in «Items».
About the last tab, «Skills», we consider it necessary to explain in detail because it is very important for making your own build in Dota 2. The character's abilities are listed here, with a leveling scale next to them. On the scale, you allocate skill levels to each ability at your discretion.
Under the abilities is the «Talent Tree». You are offered four choices between two talents. Your task is to determine which talents you prefer and to what level you will upgrade them.
When you are done with the talent customization, click «Save». That's it. Now you know from start to finish how to make your own build in Dota 2 by yourself.
If you want to show your build to other players, additionally click on «Publish».
How to Learn How to Make a Quality Build Yourself
It is not difficult — you'll only need time and the desire to learn Dota 2.
So, our recommendations:
Play ranked games with one character and don't get distracted by others. This way, you'll get a better feel for its strengths and weaknesses, especially if you try out different builds from other players and then analyze the results. After participating in 100–200 matches with the same character, you'll gain experience and an understanding of which item set suits them best.
Before diving in, check out ready-made guides from other players — especially high-ranking ones. Think about what these players aimed to achieve with these items, what they wanted to reinforce in the hero, and what they ignored. If unsure, play at least one match with the build. You might understand during the game.
Study the properties of items and their interactions: which ones enhance each other, and which ones conflict?
Activate Your Own Build Before the Match
Now that you have a ready-made build — or maybe several — it's time to use them and evaluate their performance. After all, you were wondering whether you can make your own build in Dota 2 and how.
To do this, find a «rink» (game mode doesn't matter), enter it, and choose a character. Quickly go to «Guides» (top tab) during the planning stage. Click on your build — it should appear at the top of the list.
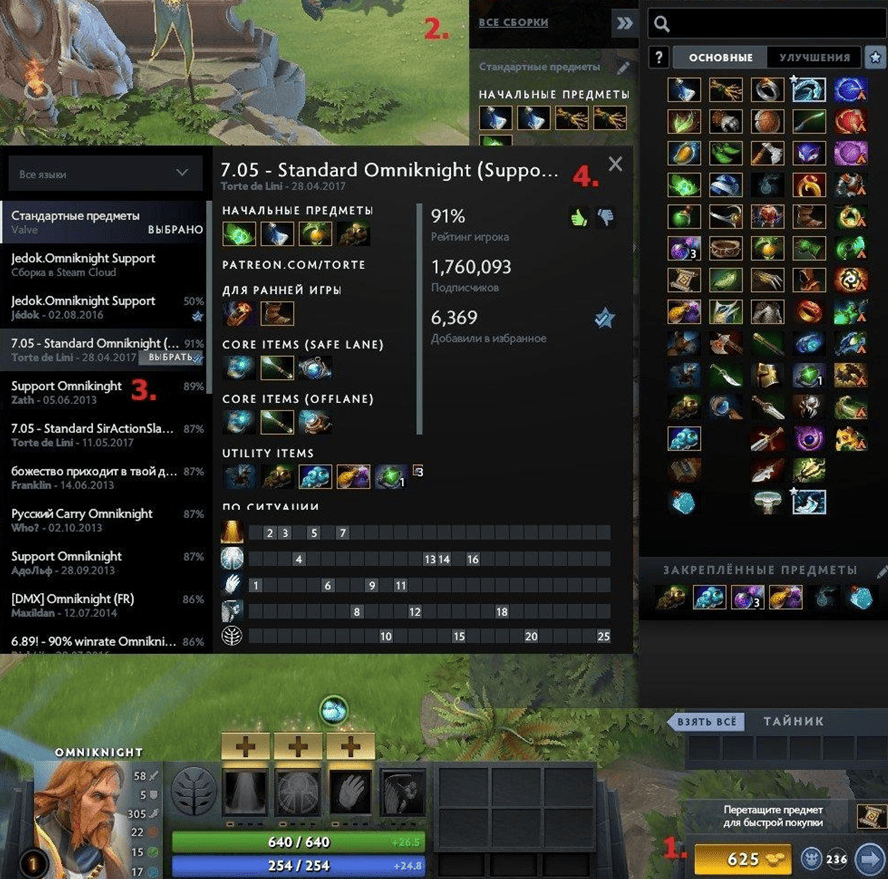
Another way to activate your build is the same as above: find a «rink», log in, and choose a character. Once the game starts, go to the shop and look in the upper left corner for «All Builds». Click on your build and enjoy — good luck in the game.
Connecting Guides Created by Other Players
As we mentioned earlier, one way to make your own build in Dota 2 is to study guides created and published by the community, especially top players. Particularly valuable are builds where authors explain why they chose certain items, how they combine them, and why specific skill leveling paths are important.
You should benefit from others' experience at least to avoid reinventing the wheel or making avoidable mistakes.
So, find any «rink», enter it, and, as usual, select a character.
Then go to the shop and in the upper left corner click «All Builds». From the list, select the build you like. For more info, click «View» (bottom right corner).
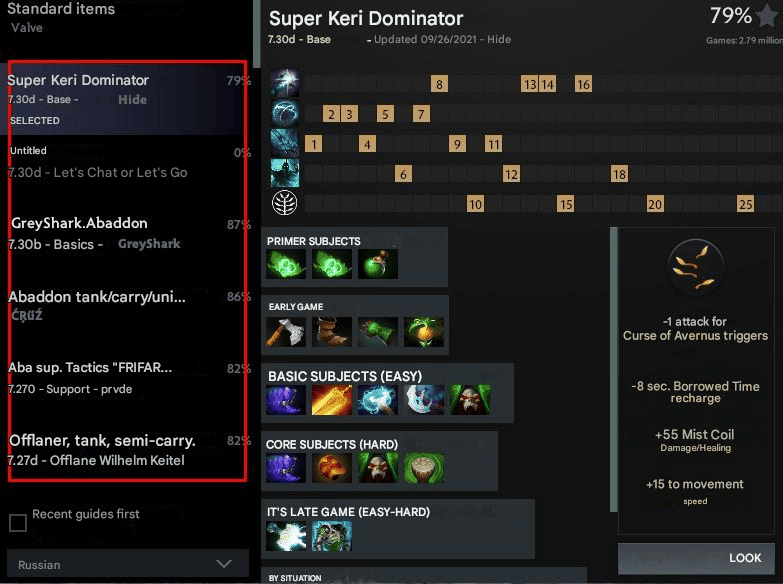
Rate the item combination, description, number of followers, and overall rating. Once you've decided, click «Select».
If you decide to switch to another build, simply repeat the procedure described in this chapter.